How to Setup Brother Printer WiFi – Printers are getting more advanced nowadays. One of the best features from the latest printing devices are the wireless features. For instance, if you have a new Brother printer, you will be sure that you can process some printing activities wirelessly.
However, if you have some trouble setting up your Brother printer, and you are not in the right time to get the cable and connect to the device directly, you need to understand how to setup Brother printer WiFi.
Setting Up Brother Printer WiFi
- First step, you need to find the latest wireless settings of your home network. You need to look for the SSID and the password.
- Once you get the password, turn on your Brother printing machine, press the Menu button that is available on the printer’s control panel.
- Find Network on the menu by pressing the Up or Down button. Then, select WLAN.
- Enable the WLAN by selecting Yes. The printing device will start searching for the available network.
- Connect to the network at your place using its SSID and password.
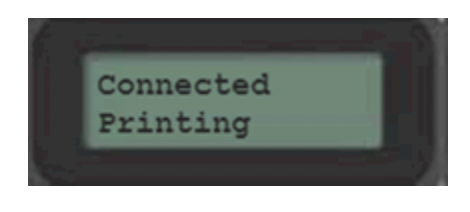
- The wireless of your Brother printing device is working if you see the word Connected – Printing on the LCD display.
Download Brother Printer WiFi Software
After you have set up the Brother printer wirelessly, you need to download the full software of your printing device. It is important to have it since the printer is quite difficult to be operated without the software. You can get the Brother printer software by clicking the button below. Choose the software based on your Brother printer model.
Thank you for reading our blog post about how to setup Brother printer WiFi. We really hope that you can solve the wireless setup process using our tips here. If you haven’t downloaded the Brother Utilities software, go to the homepage of this post to get it.
To get Brother MFC Drivers, click this link! Thank you for reading!